Partner Enrollment


Step 1: Go to the shopping site here.

Step 2: Click on “Become a Partner” located in the top left corner of the web page.


Step 3: Enter the name of the sponsor you would like to enroll under. If you do not have a sponsor, click on the “Not Referred” button.


Step 4: When you select your Sponsor, click on their name, and it will take you to a confirmation page, and click the “Continue” button to go to the shopping page.
**If you selected the wrong person, you can click on “Change Partner” to search for your Sponsor again.


Step 5: On the shopping page, you will see a banner indicating you are shopping with your Sponsor and the annual Partner fee will automatically be added to your shopping bag.


Step 6: Select the products you would like to order today.                                       **During the enrollment process you can also set up your Monthly Subscription. To add product to your order, click on the teal box. To add product to your Monthly Subscription, click on the orange button.


Step 7: Once you have added your products to your bag, click on the shopping bag icon, then click on the "Checkout" button.                                                                     **If you added product to a Monthly Subscription, it appears separate from your enrollment order. See example below. 


Step 8: On the Checkout page, you will see your Sponsor listed in the Sponsor section.


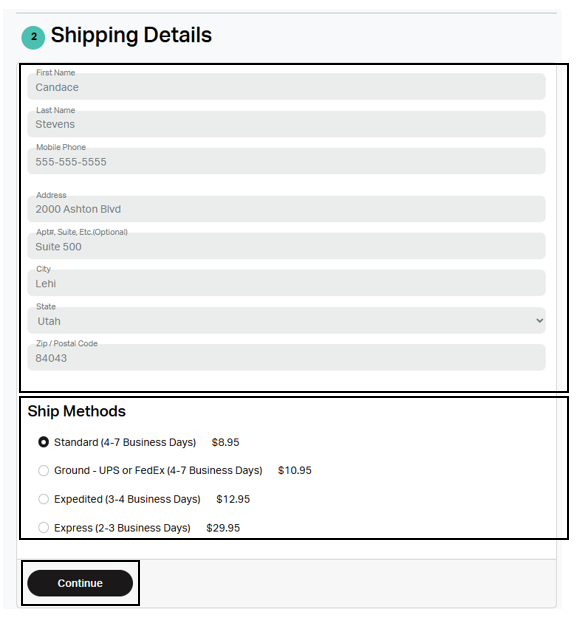
Step 9: Under the Shipping Details page, enter your shipping address - making sure to include your email and mobile phone number and click "Save".


Step 10: Orders will default to our Standard Shipping (4-7 business days). If you would like to change the shipping method (Expedited 3-4 business days or Express 2-3 business days), click on "Edit".


Step 11: Next, enter your Birthdate (Month, Day, Year).


Step 12: Partner Information section will have you enter information for your Partner Replicated website, Recognition Name, and Social Security or Social Insurance Number. Once you have filled out the following information, click on the “Save” button. 


Web Alias: Decide what you want your customized enrollment link to be. You’ll send this link to prospects who want to sign up under you.


Recognition Name: What would you like to be addressed as for any type of Recognition from Xyngular. 


Tax Information: Enter your Social Security Number (US) or Social Insurance Number (CAN). If you are upgrading as a business entity, you can select the Business option and enter your Tax ID.


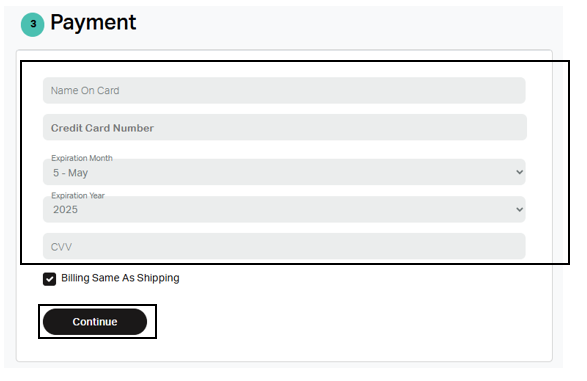
Step 13: Under the Payment section, you will enter in the card you would like to use for your order. Enter your card information and click "Save"                                             **If you are using Klarna as a payment option, please be aware of both our Return Policies and Klarna’s Return Policies. For Xyngular’s Return Policies click here.


Step 14: To complete your enrollment, check the box indicating you agree to the Policies & Procedures. Then click the “Complete Enrollment” button.